Manage Resources
Resources are non-trackable content such as policies, recipes, how-to videos, menus, job aides, manuals,courses, or links to external websites you want learners to be able to access anytime they need. Resources can be organized into categories to make them easy to use and easy to manage. You can also decide whether to make a resource available to all learners or restrict its use to specific roles, skill positions, or locations.
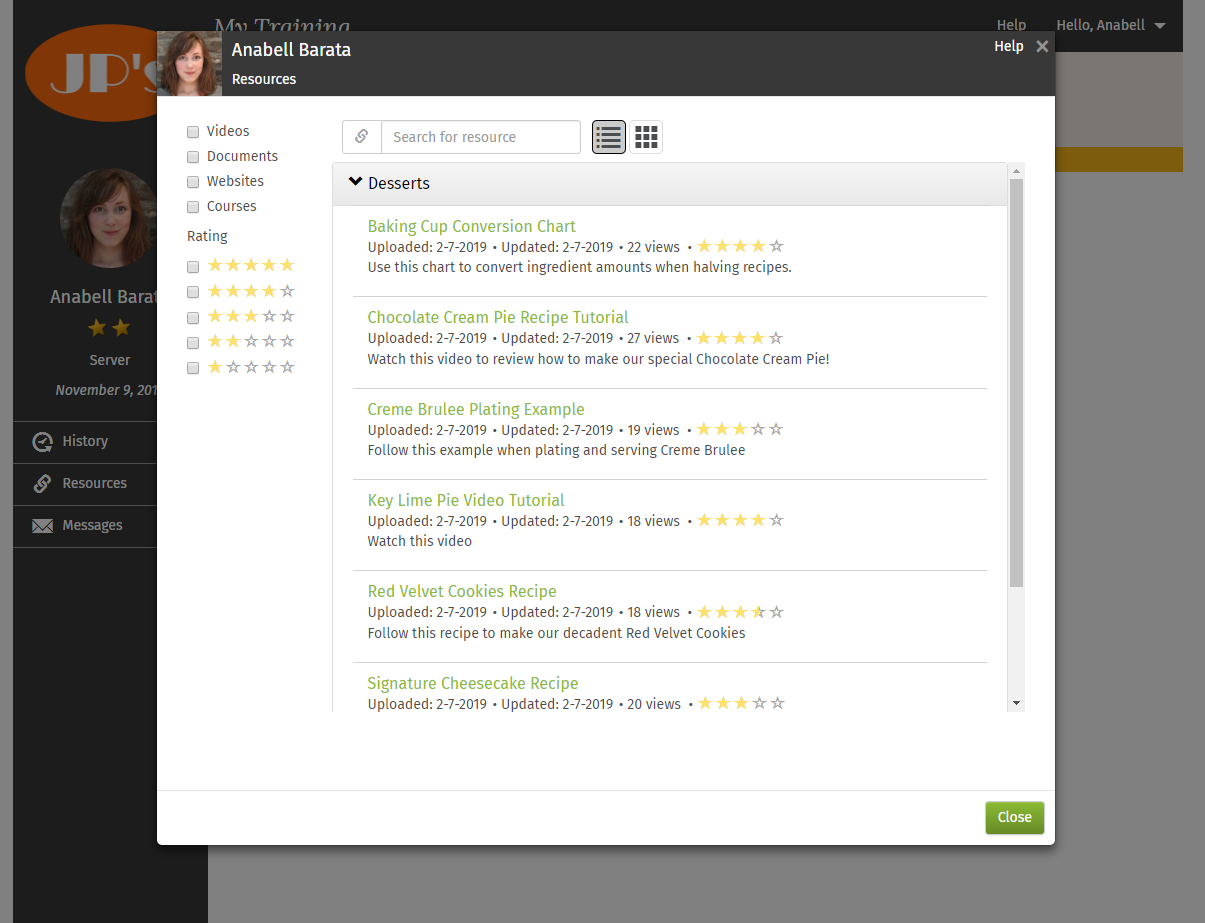
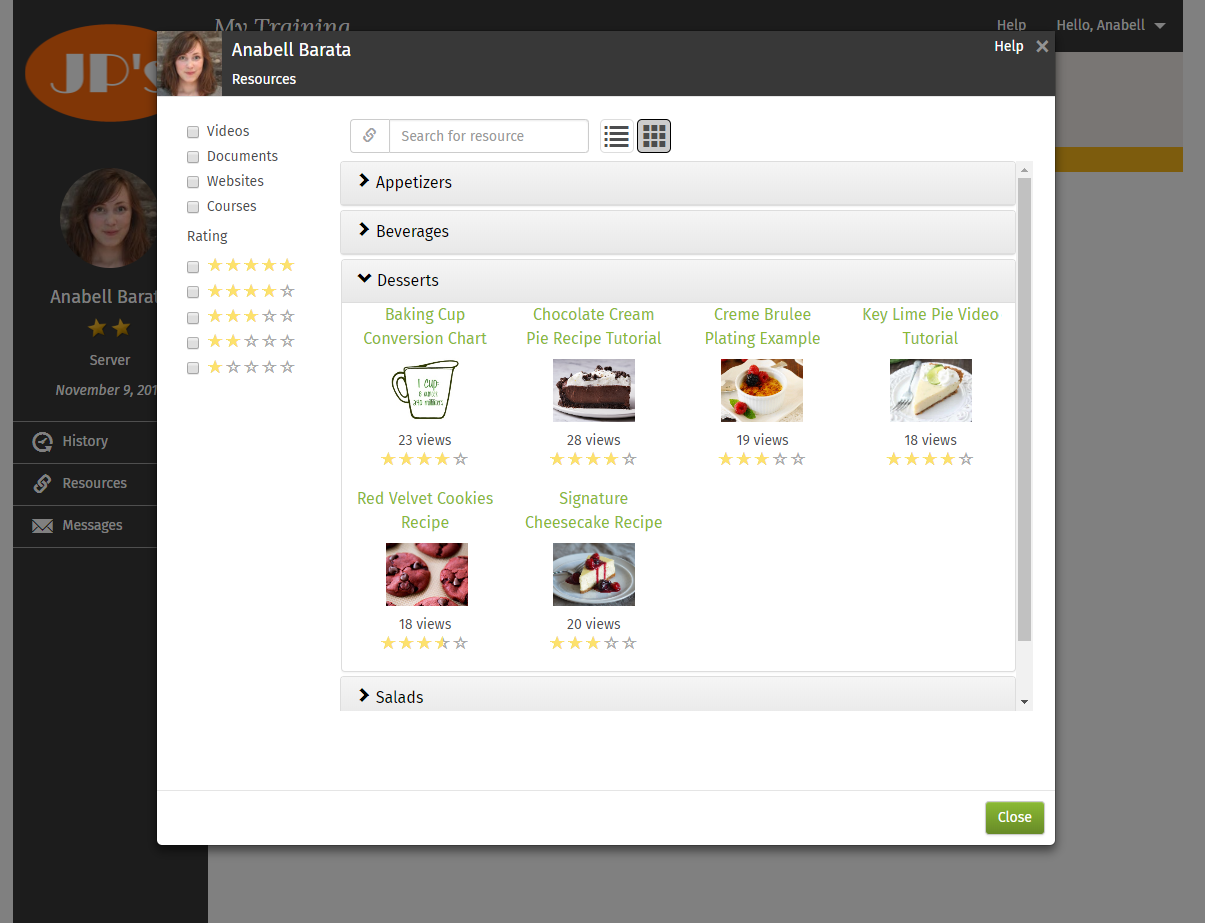
Learners can rate resources with 1-5 stars and leave comments about their usefulness. Resource items can then be filtered by the average number of stars received.
Resource Availability & Visibility
When creating a resource, you can:
-
Specify the locations in your campus at which the resource should be available
-
Specify the roles and skills for which the resource can be seen and used
-
Assign the resource to a category to organize items for maximum efficiency
-
Designate a resource type, which can then be used for filtering
-
Tag the resource with keywords to make it easy for learners and administrators to find what they need
-
Enable ratings to open a feedback channel on the resource
Note: Anyone who has Manage Resources permission can see all resources at a campus by going into the Resources link under Settings on the Campus Home page.
Resource Ratings
First, in case you are looking at your resources and wondering why you can't see stars and rate things, ratings are off by default. You must enable the rating function for each resource you want rated. You won't even see the 5-star filter on the Manage Resources screen unless you have ratings turned on for at least one resource.
Resource ratings work much like they do on popular social media sites while at the same time giving managers the control they need to maintain a professional workplace. The availability of the ratings platform to learners is optional and managed on an item by item basis when the resource is created. Ratings are off by default. When ratings are enabled for a resource, learners still have the option to proceed without leaving ratings.
The number of views will be zero for each file at the start and then increment appropriately as your resources are viewed.
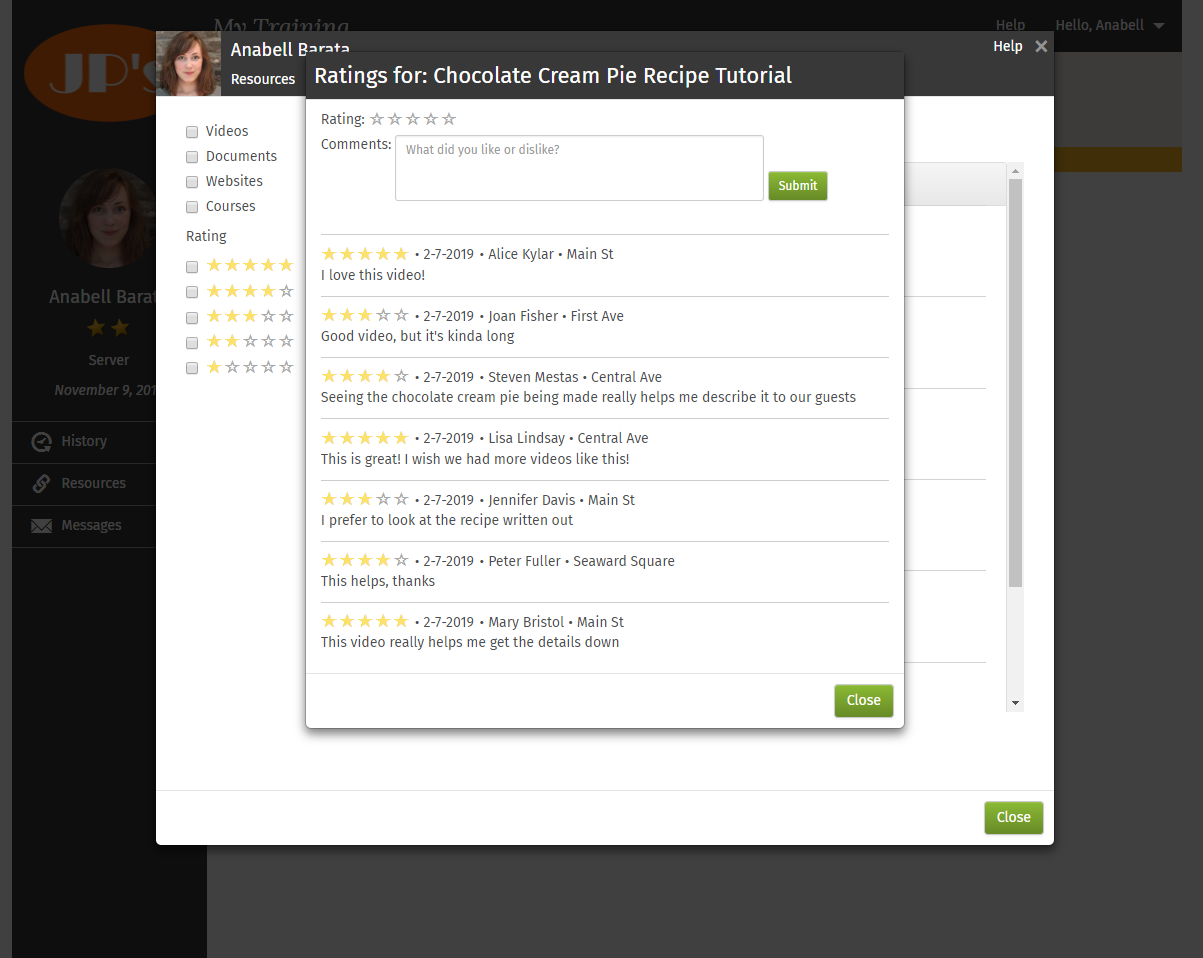
Learners access ratings by clicking the stars on their list of resources:
The ratings screen displays allowing them to rate the item using 1-5 stars and then enter comments. While participating in the rating process is optional, if anything is entered, both the 1-5 star rating and a comment are required. Learners can only enter one rating per item. If, however, an administrator deletes a rating for an item the learner can then enter another.
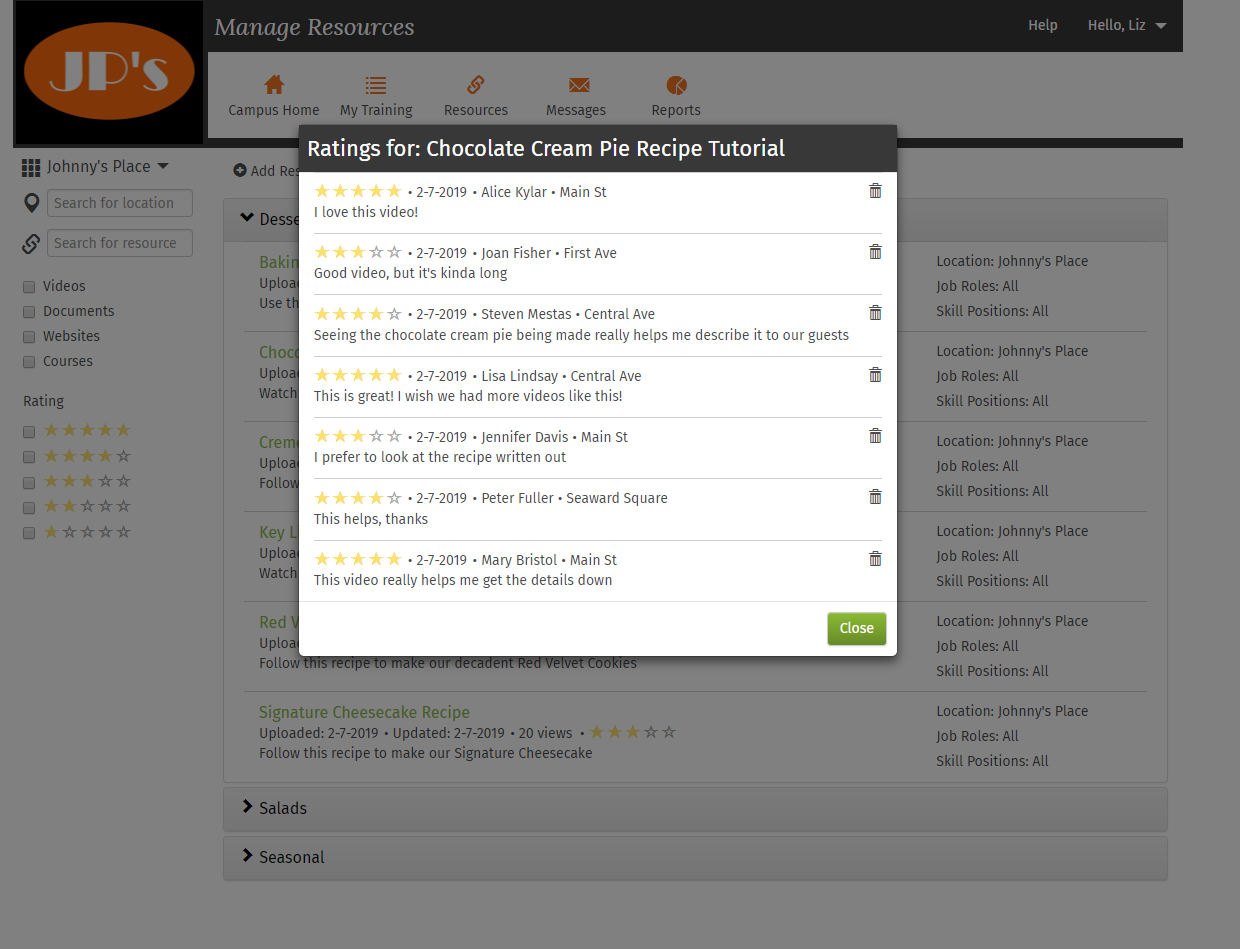
The administrator’s view of the ratings on an item includes a delete tool:
Ratings Fundamentals
Summary of key details about ratings:
-
Ratings are optional and enabled on a resource by resource basis
-
The ratings default (for each item) is off (you will not see the stars)
-
When a learner enters a rating, both the 1-5 stars rating and a comment are required
-
Learners can enter only one rating for a resource
-
Administrators have the ability to delete ratings
-
If a leaner’s rating is deleted for a specific resource, another one can be entered
-
If a resource item is deleted, all the ratings entered for it are deleted also
-
If ratings are turned off for a resource, any ratings that had been entered are retained and will be there if ratings are then turned back on
-
Both administrators and learners can filter their view of resources by the 1-5 star rating
Resource Types & File Types
Resource Types
There are four resources types to help you organize your resources in a logical manner that is not dictated by file type. You and your learners can filter on these resource types to get exactly the file that you are looking for.
-
Videos – Can be uploaded files of any type or a link to a website
-
Documents – Can be uploaded files of any type or a link to a website
-
Websites – Is a link to a website
-
Courses – Is a reference to a course that already exists in your manage content area
File Types
Resources can be any of a variety of file types.
-
Video and document resources can be any of the file types that you are accustomed to working with:
|
DOCX GIF JPEG MOV
|
MP4 PNG PPTX
|
TXT WAV XLSX
|
-
Website links can be to both HTTPS and HTTP sites
-
The courses in resources are references to your courses in manage content and so any course type that works now will work for courses in resources
File Size
-
The size limit for any uploaded file is 500 MB (per file)
Video Best Practices
There are two ways video can be viewed by learners: it can be downloaded onto their devices or it can be streamed to them.
When the CrunchTime! TalentLink Mobile App becomes available, users will have the option to download resources to be played offline. Because of this, we recommend that you upload to CrunchTime! TalentLink any video that you might want viewed offline.
Video that you upload to YouTube, Vimeo, or Wistia is intended to be streamed rather than downloaded (in fact, it is often difficult to download video from services of that nature). Because services like YouTube, Vimeo, and Wistia have such high quality streaming servers, we recommend that you upload video you want streamed to them.
When using streaming video, however, remember that bandwidth limitations in your locations can negatively impact the quality of the training experience.
When creating video, we recommend the following:
-
MP4 file type
-
H.264 codec
-
Maximum file size of 500 MB (per file)
Approved Domain List
CrunchTime! TalentLink uses multiple dedicated servers to house client uploaded files. To ensure that your firewall will always allow you to reach your files please make sure that your IT Team has the following domains on your approved domain list. These domains should already be in your approved domain list but it is worth double-checking to make sure there will be no issues when utilizing resources.
-
*.discoverlink.com
-
dc.services.visualstudio.com
-
cdn.jsdelivr.net
-
az416426.vo.msecnd.net
-
fonts.googleapis.com
-
fonts.gstatic.com
Thumbnails & Thumbnail Views
Both learners and administrators can see resources in a list view (the default) or a thumbnail view.
Learner’s thumbnail view:
For each resource created, Talent will automatically add a thumbnail image. When Talent creates the initial thumbnail, this the routine that is followed (in this order):
-
If the resource is a course, the designated thumbnail from the SCORM build will be used
-
If the resource is not a course, or the course does not have a designated thumbnail image, we will display a default image
-
If the resource was created in a Microsoft app, the default we display will be the Microsoft thumbnail for that file type (e.g., Word, PowerPoint, etc.)
-
If the resource is a PDF, the default we display a generic PDF thumbnail
-
If the resource is not from a Microsoft app and is not a PDF, we will display a generic thumbnail for that resource type (note that this is resource type [i.e., video, document, website, or course] not file type [e.g., PDF, MP3])
-
If the resource is an image (PNG, JPEG, GIF, or BMP) we will display a thumbnail of that image
If you would prefer to add a custom image of your own, simply open the resource again and use the thumbnail upload tool in the upper right of the screen. The upload tool automatically resizes the image so you do not have to be concerned about the size before uploading.
Category Manager
Category Manager lets you add, edit, and delete categories.
Access Category Manager from the gear icon next to the category field on the screens where you add or update resources.
|
|
Category names can be up to 50 characters. See the Special Characters section for information on the special characters allowed in category names. |

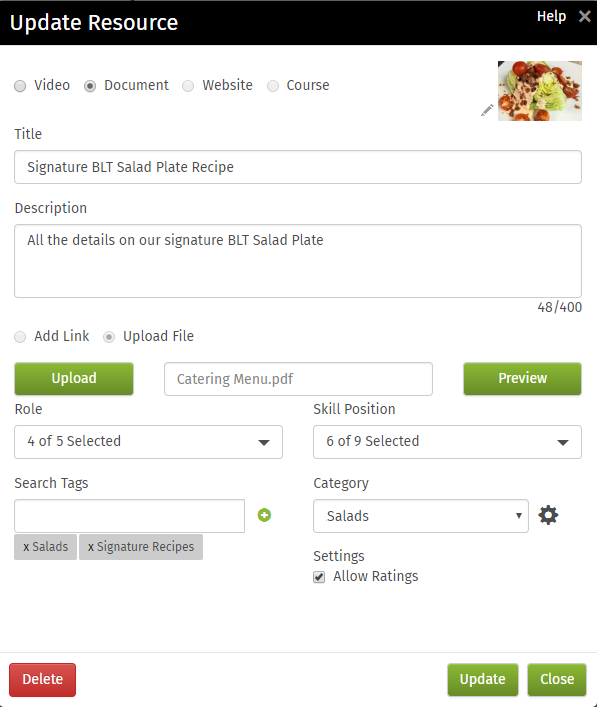
Creating a Resource
Note: The Title field accepts 200 characters and the Description field accepts 400 characters. Best practice though is to keep your titles and descriptions are concise as possible. See the Special Characters section for information on the special characters allowed in these fields.
Before you start, use the location dropdown in the upper right of the Manage Resources screen to specify where the resource should be available (see Note 1 following).
|
|
|
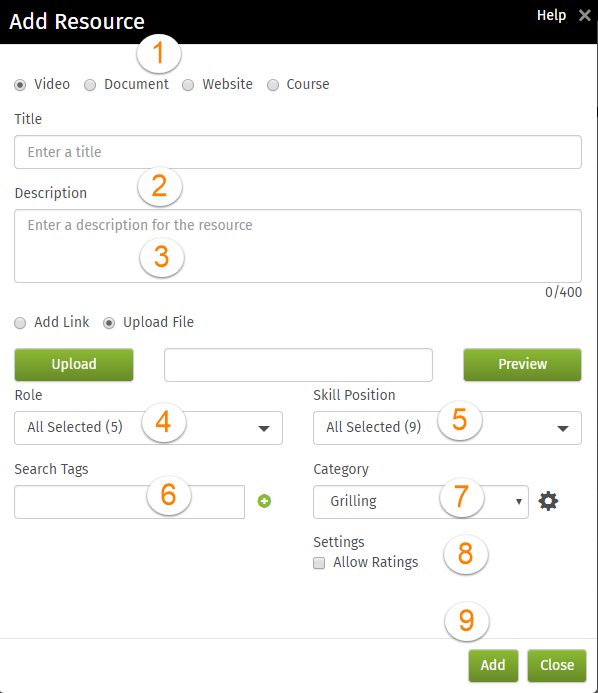
Note 1: Best practice is to create the resource at the highest level it will be used at and let it flow down instead of uploading the same file over and over again at different locations.
Note 2: Role and skill position fields used to specify availability for a resource follow these conventions:
-
The default for both role and skill position is All Selected
-
The role and skill position fields are joined by AND when creating the equation used to apply these settings
-
Within the role field and within the skill position field, multiple selections are joined by OR
Note 3: Learners who might not have a skill position will be able to see resources that are marked as All Selected (which is different from the way learning programs are handled).
Creating Resources Fundamentals
Summary of key details about creating resources:
-
Best practice is to create the resource at the highest level it will be used at and let it flow down instead of uploading the same file over and over again at different locations
-
Anyone who has Manage Resources permission can see all resources at a campus by going into the Resources link under Settings on the Campus Home page
-
Each resource needs a unique name – like-named files will overwrite each other
-
Uncategorized resources display to the learner as General
-
Ratings are optional and are enabled on a resource by resource basis
-
The role and skill position fields are joined by AND when creating the equation used to apply these settings
-
Within the role field and within the skill position field, multiple selections are joined by OR
Special Characters
When creating or entering reviews for resources, the special characters in the table following are allowed with exceptions for category names.
Exceptions: These characters are not allowed in resource category names:
-
" double quote
-
+ plus sign
-
. period
-
@ at sign
-
<> greater than and less than signs
Allowed special characters:
|
! exclamation point " double quote # number sign $ dollar sign % percent sign & ampersand ' apostrophe ( left parenthesis ) right parenthesis * asterisk + plus sign , comma - hyphen . period/decimal point / forward slash : colon |
; semicolon < less than sign = equal sign > greater than sign ? question mark @ at sign [ left bracket \ backward slash ] right bracket ^ caret _ underscore ` accent grave { left curly bracket } right curly bracket ~ tilde |
Frequently Asked Questions
-
Do learners get credit for using resources?
No. Resources are non-trackable, even the courses. Think of the resource area as more like a library where you look at things in the browsing room than as a classroom where credit is given. -
Are learners forced to give ratings in order to use resources?
No. Learners can use resources as much as they want without providing feedback. -
If resources are location-specific, should I create the same resource at each location?
Best practice is to create the resource at the highest level it will be used at and let it flow down instead of uploading the same file over and over again at different locations. -
If I turn the ratings off for a resource that already has ratings, are those ratings lost?
Those ratings are kept and will be made available again if ratings are turned back on for that resource. -
I don’t understand about resource types. How can a document be a link?
A link might be to a document that lives in Google Docs. Your learners might need a link to get their safety manual but they see it as a document. Allowing both uploaded files and links under the umbrella of documents gives you complete flexibility in how you present your resources to your learners. -
How many characters will the Title and Description fields accept?
The Title field accepts 200 characters and the Description field accepts 400 characters. Best practice is to keep them as concise as possible. -
How come I can't see any stars? I want to give things ratings.
Stars will not appear until the Ratings option is enabled on at least one resource.